Be moderate and mindful.
Add fun to your daily routine. Mix it up!
Bring comfort to your pregnancy and prepare for an easier childbirth.
Choose a few today and then choose some others tomorrow.Continue rotating through the choices to keep things interesting and your body supple.
Why try to restore years of a tight hip on the day of labor? Improve your range of motion day by day for comfort now and ease in birth later.
“Restoring Balance isn’t like instant coffee. You gotta let your length steep.”
Why wait? Improving body balance improves body function! Better tone and alignment may increase your chance of an easier birth, Better sleep is one body balancing benefit in pregnancy.
These daily activities for pregnancy will not make a head-down baby turn back to breech, nor will they make an anterior baby turn posterior.
These exercises can be done by all healthy women. These are the activities that could be done daily whether you have one or multiple babies gestating.
Consult your provider before starting these or any exercise activities.
- Looking for comfort in general and a little easier birth? Use these.
- Looking to avoid a posterior or breech position? Add weekly activities to this daily routine. (Also see Flip a Breech baby head down.)
- You can also read the Three Principles of Spinning Babies℠ to get the why.
Want even more guidance?
Download a free checklist to celebrate your progress in our Pregnancy Week-by-Week tools. Or get personal guidance with an in-person Spinning Babies® Parent Class. Find a Spinning Babies® Certified Parent Educator or try our Birth Preparation online course.
Stream a routine with Sarah Longacre of Blooma Yoga on our Daily Essentials video.
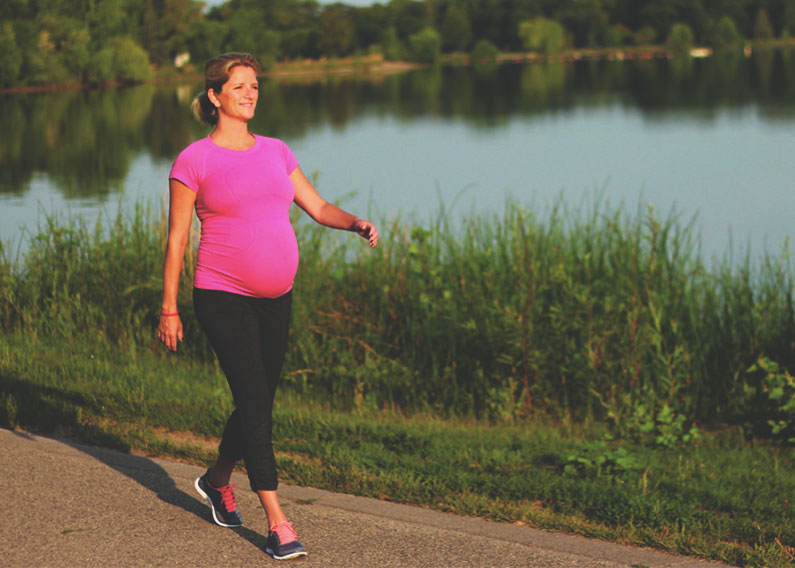
Walk Every Day
Why? Walking briskly with full motion lengthens the psoas muscles (a large pair of internal “wings” from spine to thigh). Lower back strength grows while moving the pelvis. “Pso -as” I was saying, long, supple psoas muscles give us better range of motion, emotional groundedness and flexibility, better fetal descent, and better fetal positioning (when achieved with overall muscle balance and spinal and pelvic alignment). Walking is good exercise and protects your good health.
Who does this? Everyone who can.
How? Walk in a safe place, without ice, at least 5 times a week, without pushing a stroller or stopping to window shop. Walk at a pace you can still hold a conversation.
How long? Don’t start so aggressively that you strain yourself. Gradually work up to 3 miles, or 4-5 kilometers.
How frequent? Daily!
Don’t use this if…. Your provider prohibits walking, such as when a woman is told to do bed rest or to restrict movement for health reasons.
If you have pubic symphysis pain, wear a snug pregnancy belt, and start slow. Or, wait to walk until you have done the pelvic stabilizing exercises to restore your pelvis. Then start slow.
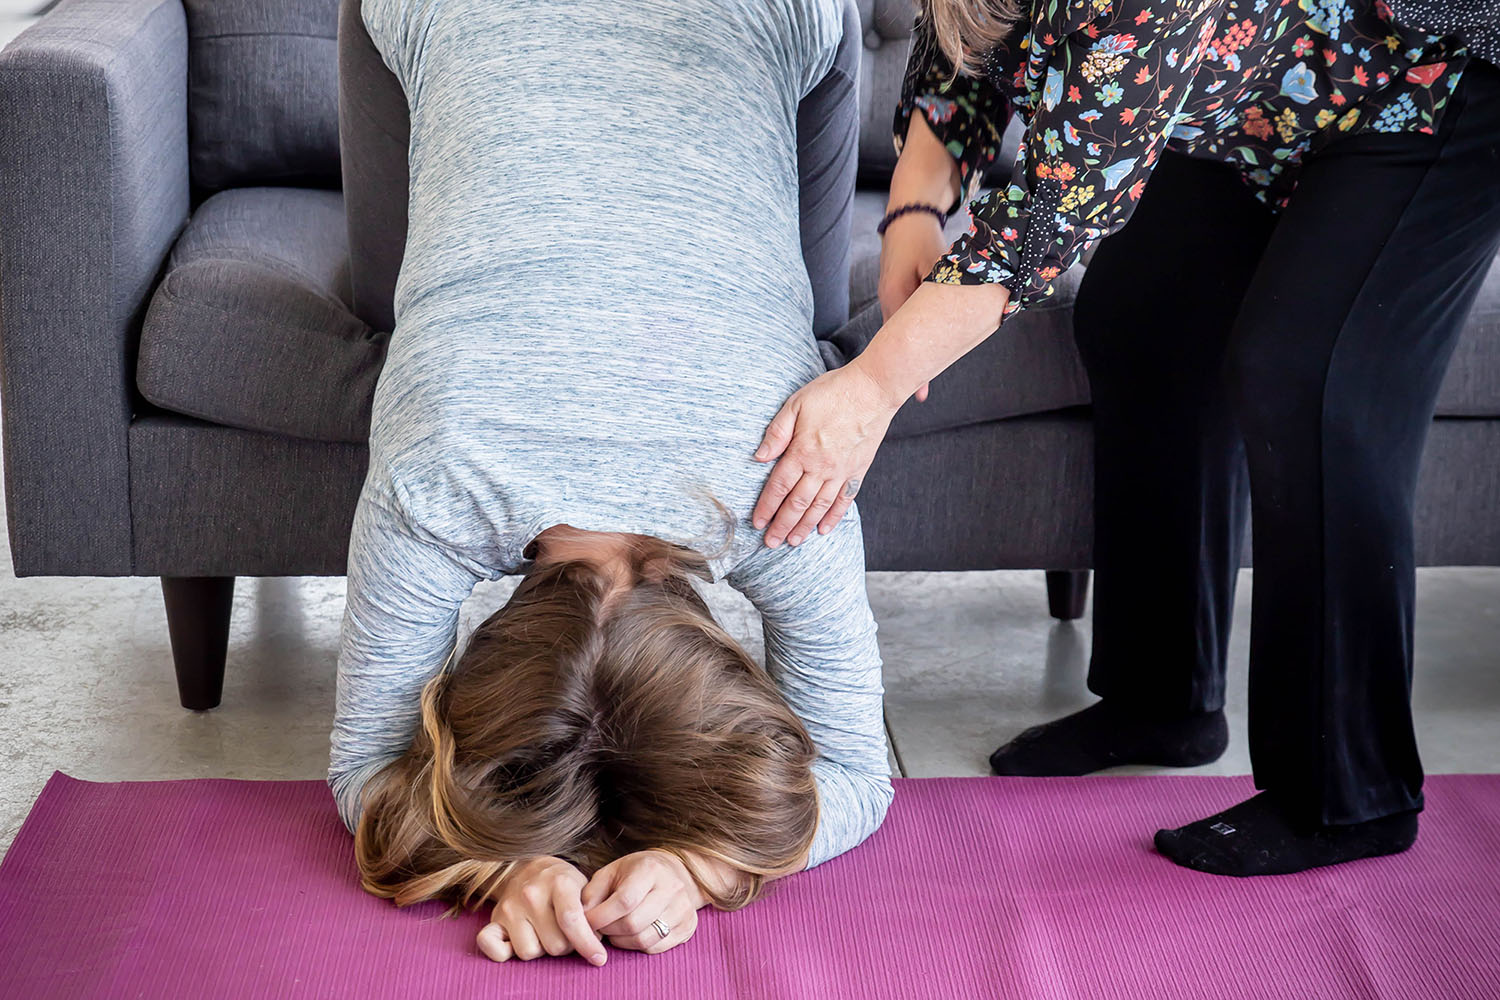
Forward-leaning Inversion
Why? The Forward-leaning Inversion potentially untwists the ligaments supporting the lower uterine segment and cervix (uterosacral, cervical, round ligament). When you rise upright again these ligaments relax. Repeating the stretch many times helps to release a possible spasm or asymmetry and allows the baby’s head to fit more easily during labor.
Who does this? All pregnant people without a contraindication. Head-down babies included if done properly. Use a reliable surface, like a bed or couch or stairs. Knees are close to the firm and secure edge. Use a spotter for the first few tries. Have a helper each time if you don’t have good balance or if you don’t feel secure doing it on your own.
Learn how: The Forward-leaning Inversion.
Thanks for originating this technique: Dr. Carol Phillips, DC, for teaching Dynamic Body Balancing and emphasizing the importance of the Forward-leaning Inversion.
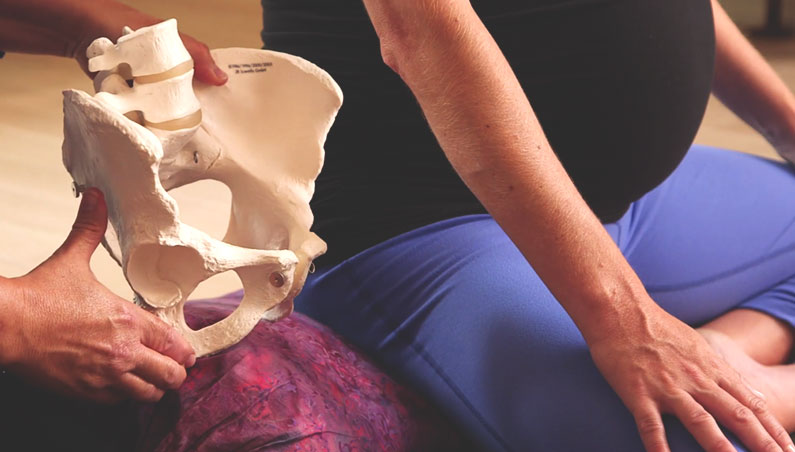
Maternal Positioning
Jean Sutton, co-author of Understanding and Teaching Optimal Fetal Positioning, recommends we sit with our:
- Knees lower than the level of our hips
- Belly lower than our hips
- Let your belly be a hammock for your baby
- Let your lower back sway forward as you stand and walk
- Sit on a kitchen chair – backwards!
- When using an exercise ball make sure your hips are not lower than your knees!
- Keep an upright back by sitting on the front of your sitz bones — not back on your sacrum
Read more: Maternal Positioning in pregnancy.
Are you eating well?
Remember to drink about 2 liters a day or 3 quarts of pure water. Eat 6 protein servings (meat the size of a pack of cards, a handful of almonds, two eggs, a cup of yoghurt). Have some salt in your food (choose iodine supplemented table salt) to distribute the fluids properly. Eat plenty of dark, leafy greens and fresh from the garden when possible.
Dynamic motion:
Sit on a Swedish chair or exercise ball for a straight back. Let the abdomen become the hammock for the baby.
At a computer frequently? Get up hourly. Keep elbows and knees at a 45-degree angle and wrists floating above the keyboard.
Sitting on a firm ball will help your hips to stay fluid. Get up and move around frequently.
In the car:
If you are sitting in a car, please do not sit up on a cushion. In the case of a sudden stop, sitting on a cushion puts you and the baby in a dangerous position. Instead, sit on a small physiology ball, such as a slo-mo ball, in which only ONE PUFF of air is in the ball and then the plug is replaced. Put it between your tuberosities so that they touch the car seat, but the ball is between them. Now you have dynamic motion for the car. You will have less pain.

When you get in and out of the car, KEEP your knees and ankles CLOSE together. Swivel your hips to get your feet in and out of the car together. This will help prevent SI joint pain.
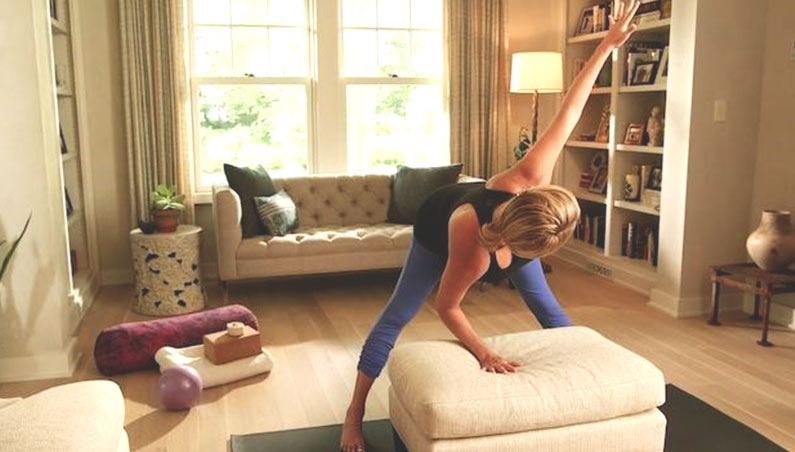
Stretching out every day is good for circulation, metabolism, and comfort. Each day, release tight bun muscles from your feet up and your head down. As above so below; so relax your jaw, loosen your neck and open your shoulders. Try these exercises!


ACTIVITY 5:
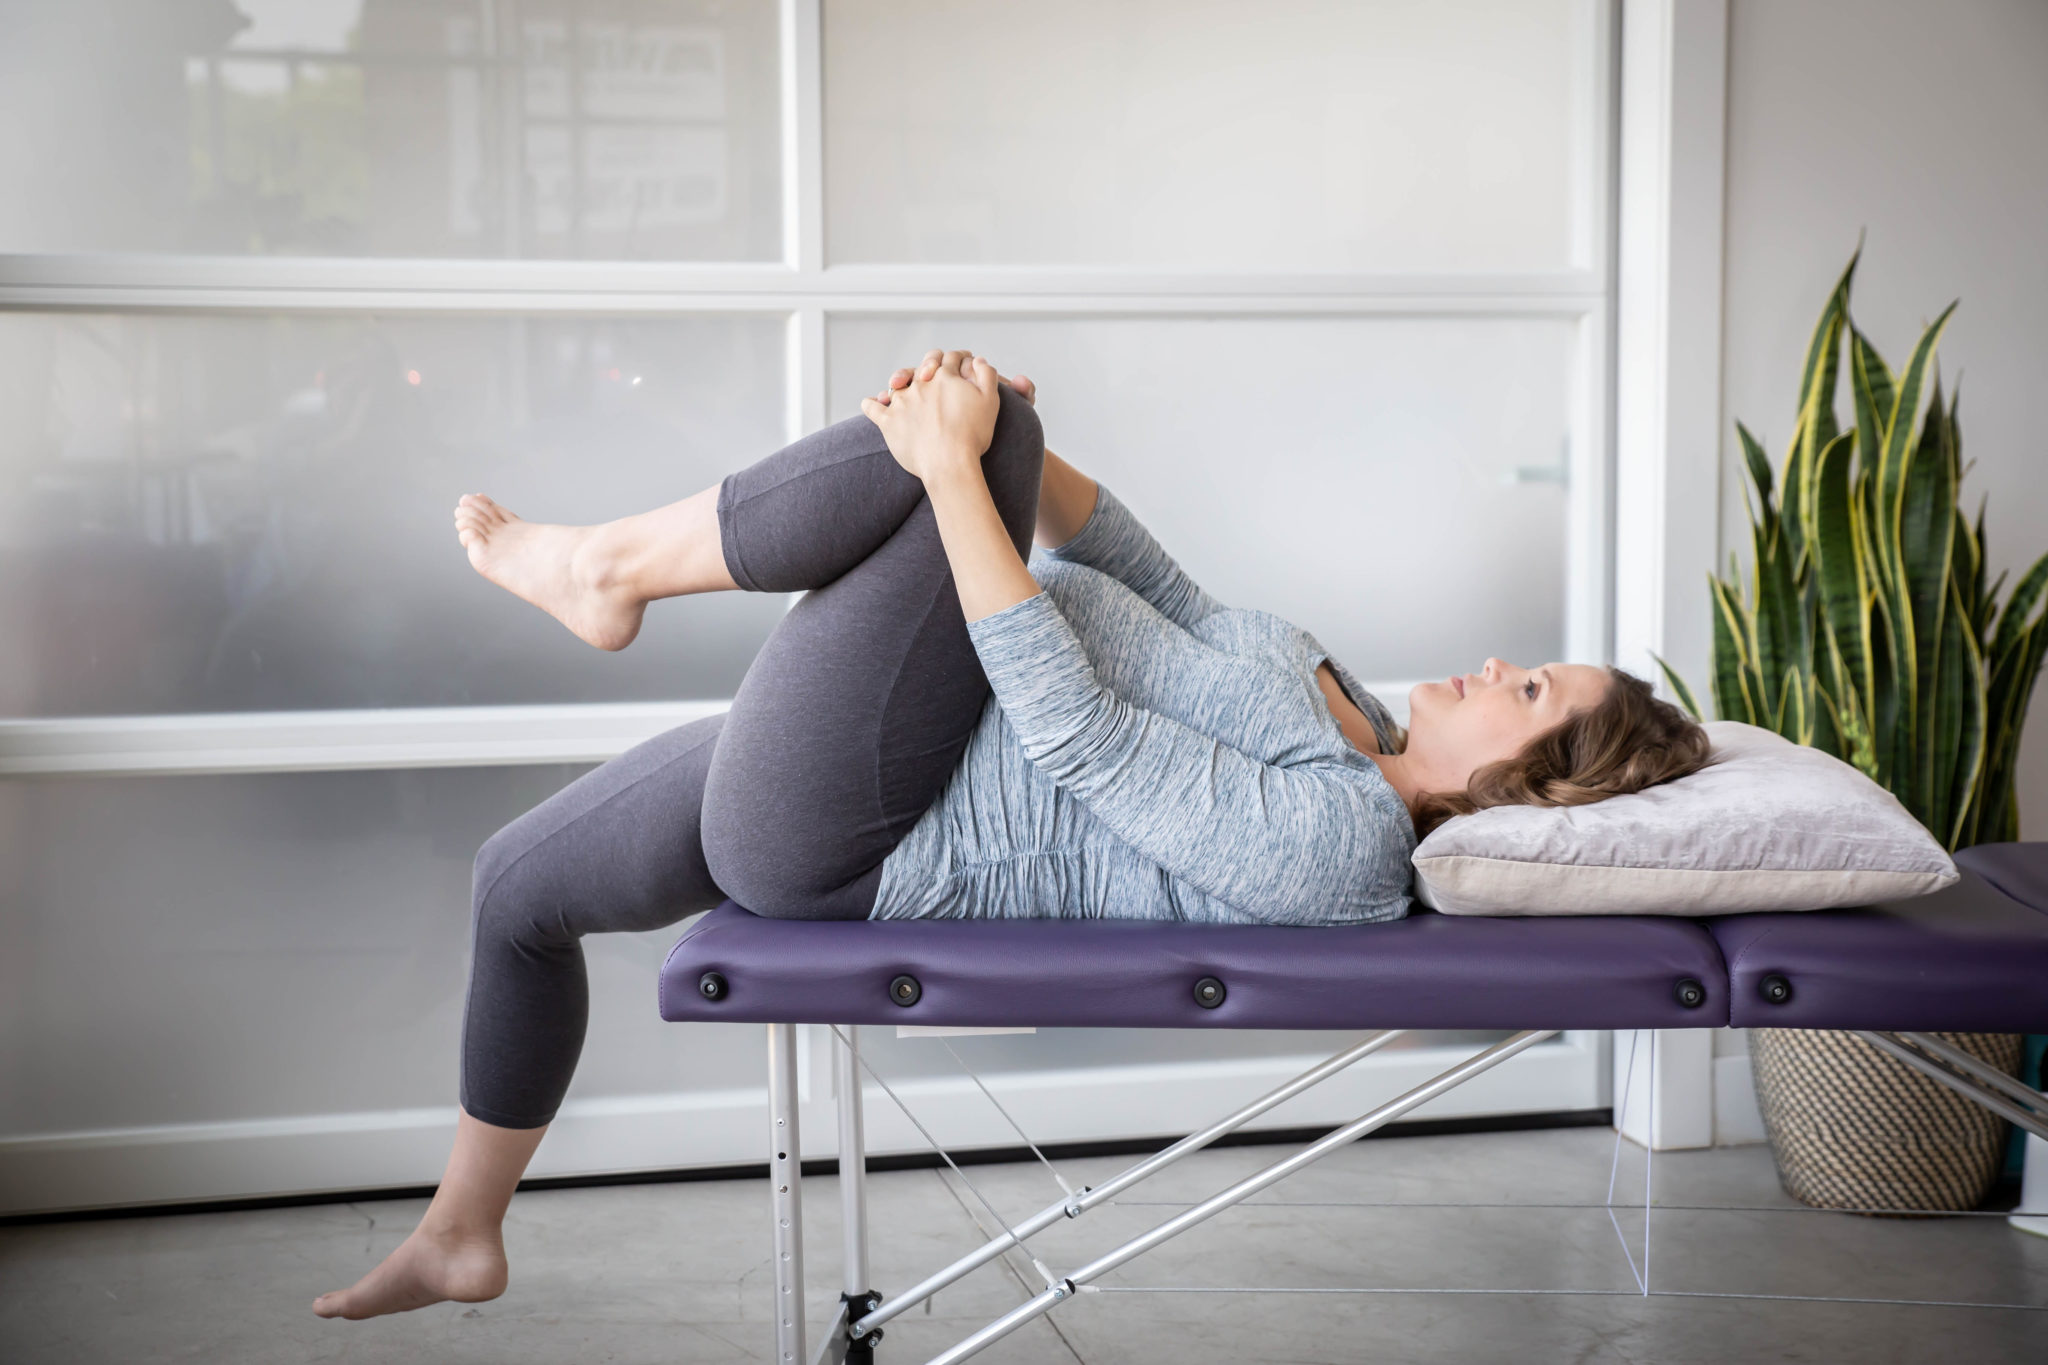
Psoas Release
Why? A tight psoas muscle pair keeps baby high. A longer, more supple psoas is one of several factors helping baby engage at 38 weeks gestation. Digestion, walking, balance, and comfort are all enhanced with a longer psoas muscle pair rather than a shorter or less supple psoas.
Who does this? Yourself.
How? Lie on your back on your bed or a massage table so that the bottom of your buttocks is at the very edge. Bring one of your thighs up at a 90-degree angle and hold it to your abdomen. After 2 1/2 to 3 minutes, change legs. Repeat. Roll to your side and get up slowly.
How long? 3 minutes each leg for 6 minutes total.
How frequent? Daily, or nearly so.
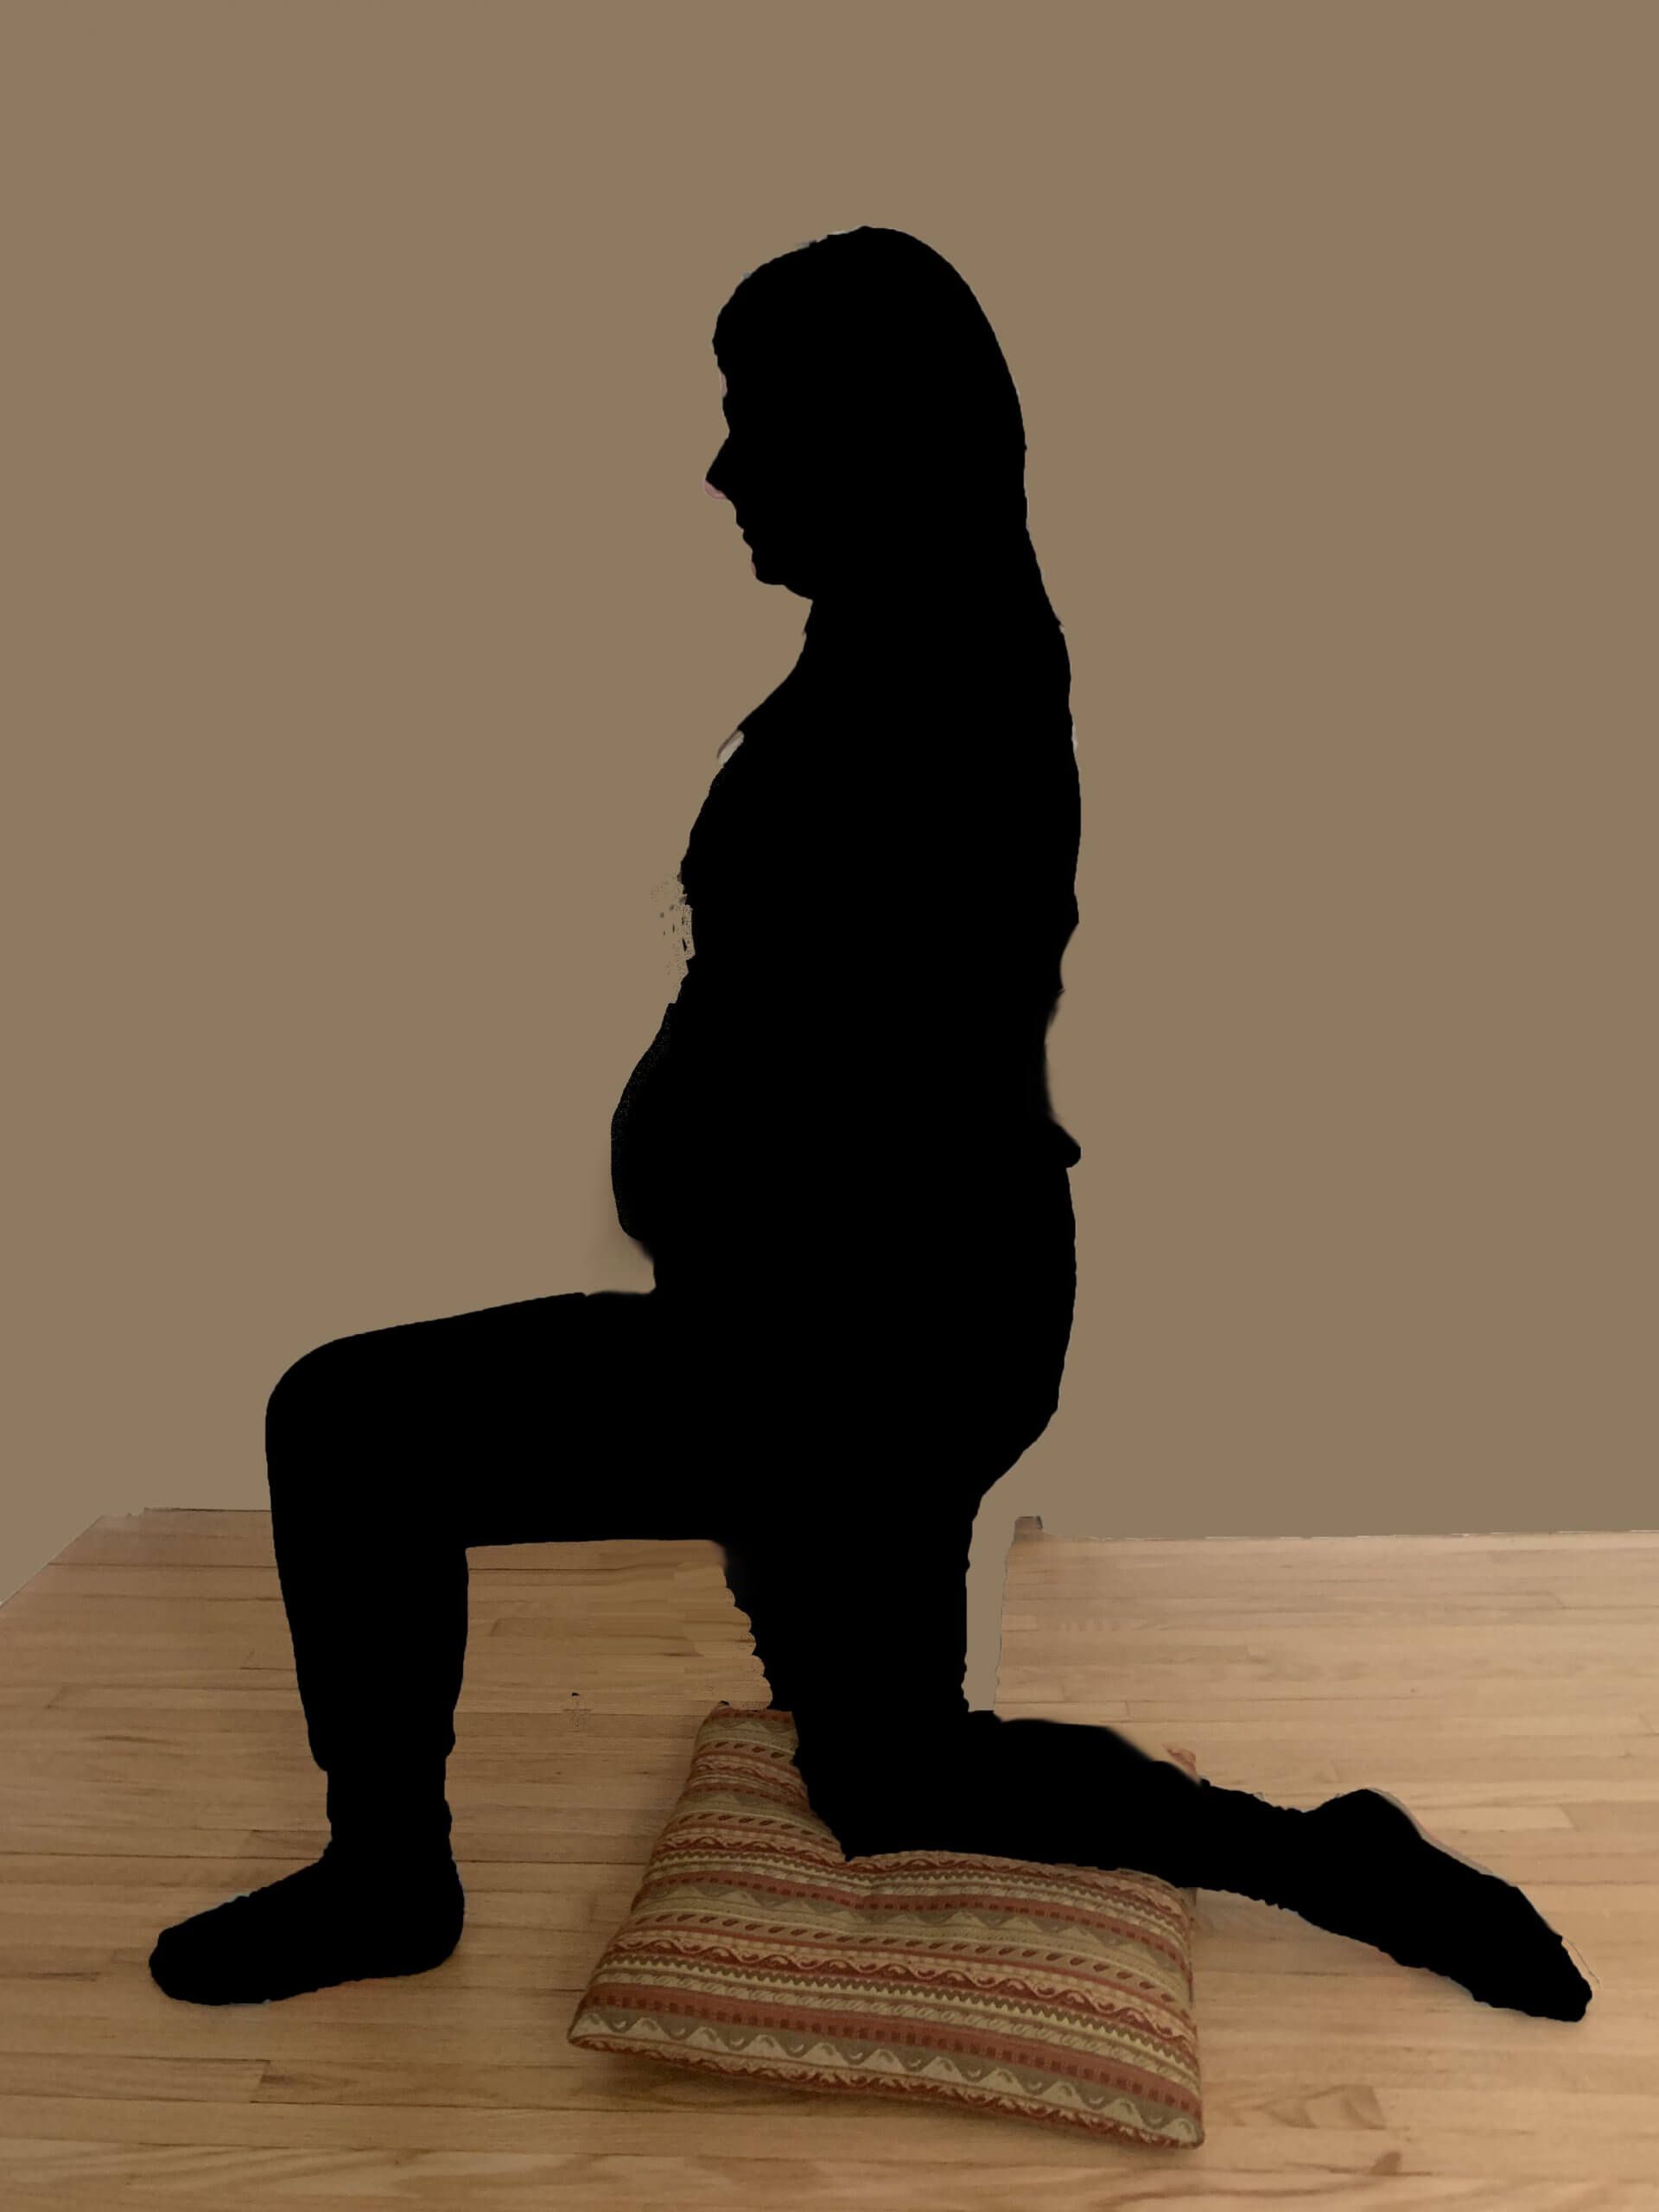
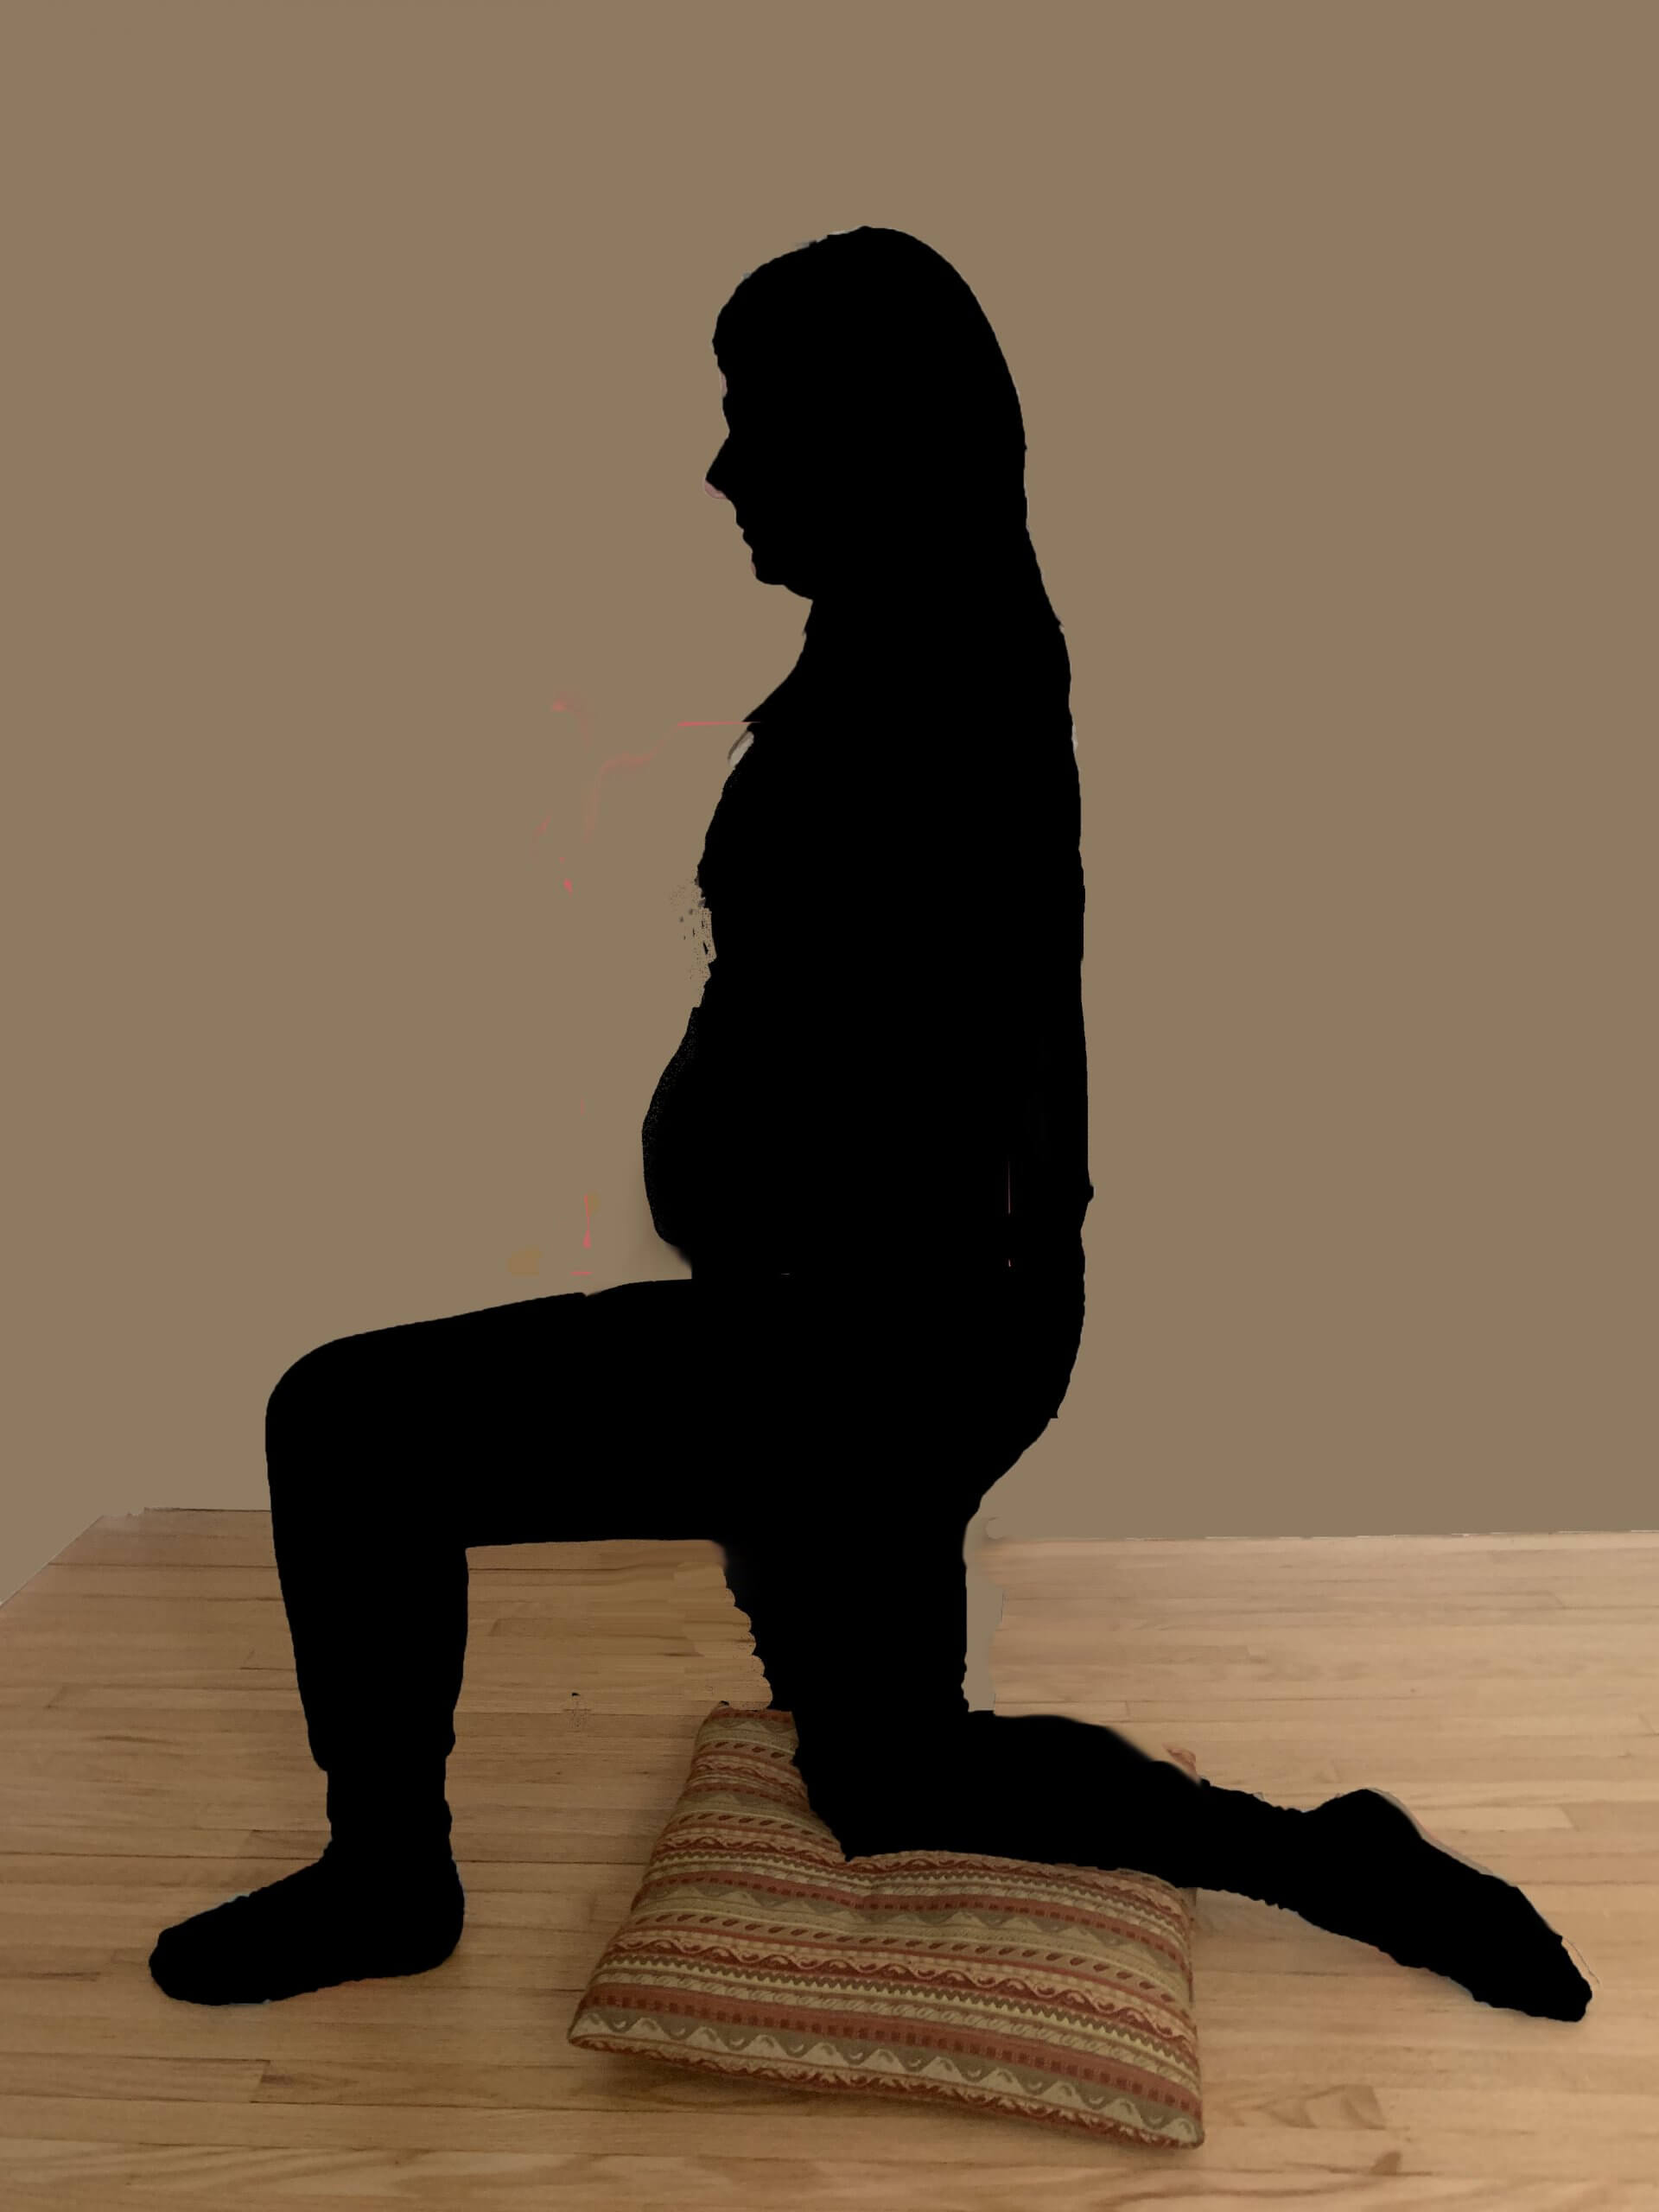
Kneeling on one knee while the other knee is raised and directly over the other ankle allows a steady pose for lengthening the psoas. Start with by tightening your buttocks and tucking your tailbone and then move both hips forward equally. Take a breath in this position. Can you feel the stretch in the front of your thigh and into your groin on the leg that is resting on the knee? Don’t over stretch. Repeat 3 times on each side. Do daily.
Note: Can’t lay down? Your lunges, when done properly, will help your psoas, too. As will daily, brisk walking, breathing deeply, and letting your belly relax. Kneeling lunges, standing forward lunges, and sitting with your knees lower than your hips help lengthen your psoas. Any activities that arch your body backwards from your leg socket, so to speak, will help. Drink water to hydrate your psoas or the stretches won’t find a muscle with mobility.
See more about the psoas and more ways to lengthen your psoas under the Techniques menu.
ACTIVITY 6:
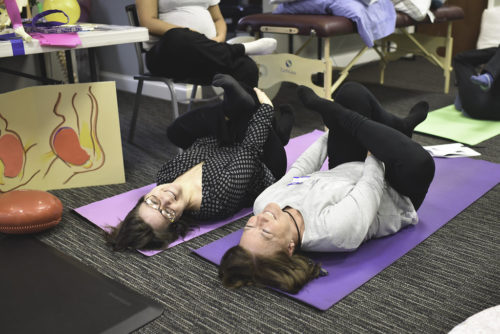
Hip Openers
Open up those hips daily!
Technique: Hands through the hole
Why? This technique balances the pelvis and “opens” the hips, allowing easier descent of the baby in labor.
How? Lay on your back. Bend both knees with your feet flat on the floor. Breathe a few times. Lift one leg (for example, your right knee), and put that ankle above the bent knee of the other leg. Put one hand through the hole your right leg makes and grab the thigh or shin of the other leg (left). Lift the left leg to grab it. Hold the pose for a bit, and stretch your lifted knee, in this case, the right knee, away from your head. You will feel a stretch. Don’t hurt yourself. Take a few breaths. Put both feet down again and breathe a breath. Then do the opposite leg in the same way, opening the left knee, this time, away from your head.
How frequent? Daily when you can, but three times a week for your body to respond.
Don’t do this when…. lying on your back is impossible. Use the chair method instead!
Thanks to Colette Crawford from whom I first learned this from her yoga video for women’s health.
Technique: 3 Hip Openers/Leg Stretches
Why? Hip flexibility and pelvic balance.
How? There are three steps. Wrap the strap around the ball of your foot. She could use a pilates band, a belt, or even a sock.
First, both hands hold the belt. The right leg is straight, but not locked. That takes awareness. Lift the thigh muscle towards the hips to make the leg “active.” Relax a bit while keeping your leg active. Notice your breathing. Let it be free. Then lift your leg towards your head. Don’t hurt yourself. Give yourself a few weeks to get more flexible.
Second, transfer the “belt” to your right hand. Let that leg open and rest on the wall. Again, the leg is straight but not locked. Breathe freely. Relax your leg into this while keeping your thigh muscle lifted toward your hips.
Third, cross your right leg over your body and rest it on a wall (or chair). Let your leg rest, supported like that.
Switch legs and begin again.
How long? A minute or two for each step, or shorter, and then repeat both sides again.
How frequent? 3 times a week or more.
Don’t use this if…. Again, only if someone can’t be on their back.
Thanks to Clare Welter, CNM, who taught me this. Using the props helps immensely!
ACTIVITY 7:
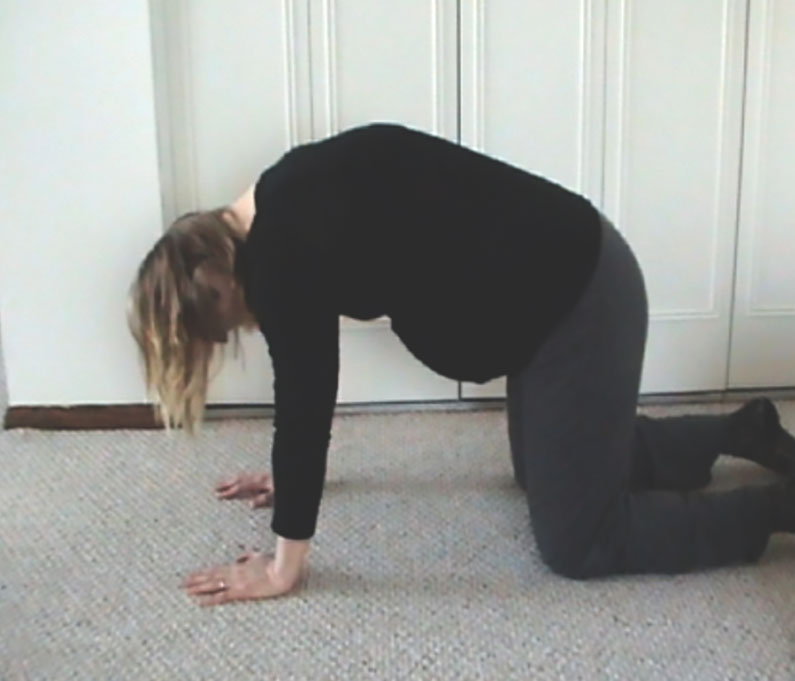
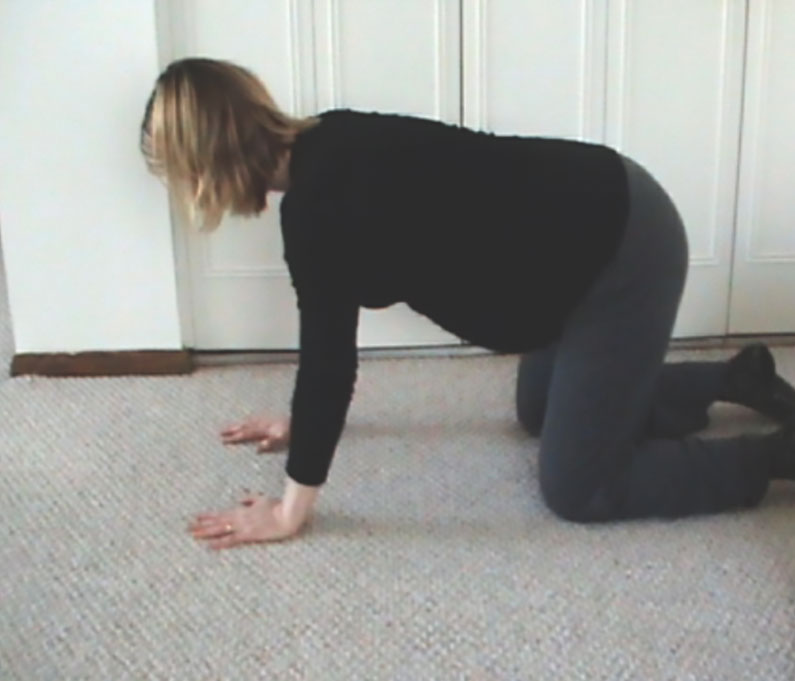
Pelvic Tilts
Why? Loosens the hips and sacrum. Relaxes the lower back and soothes an achy back at the end of a long day. Do pelvic tilts at the end of each day for comfort and to enhance flexibility.
Who does this? The mother. No professional help is necessary, but a yoga teacher or physical therapist can give advice about technique.
How? A folded yoga pad, quilted blanket, rug, or towel protects knees and wrists. Leaning over a birth ball or couch seat can be done if your wrists are too tender. Or go down on your elbows for “cat cow” and undulate that spine! Don’t sway your back — it’s “cat tabletop” – your back goes from straight and then arches up (cat, Position B).
Start with your hands under your shoulders, knees under your hips. Knees are a little apart, not touching.
Focus on your lower back. Lift your lower back. Flatten your back again. This is like a “cat cow” yoga pose.
How long? Do 20-40 pelvic tilts for comfort, usually about 2-3 minutes.
How frequent? Daily for comfort, or as needed. In labor, for 20 minutes.
Do this when… the lower back is tired or achy, or the hips are stiff. After balancing techniques to help baby swing to the anterior, or during labor through several contractions for the same aim.
Don’t do this if… Wrists or knees are too weak or damaged. Use a cushion for your knees and lean over a birth ball or soft chair so you aren’t resting on your wrists if that’s better.
Note: It’s good to rest on your belly in child’s pose, on hands and knees, but don’t expect pelvic tilts to be the one technique to turn a baby. Solutions rarely work in isolation. Pelvic tilting works better with contractions to turn baby. Do in pregnancy to keep your sacrum flexible and your spine comfortable!
Thanks to Penny Simkin, PT, who taught all of us doulas the importance of the Pelvic Tilt. And to my sister, Kathy, who taught me this when I was 17 years old while she was helping me prepare for a natural birth.
By the way, and this is a major point. Pelvic Tilts are not “Spinning Babies®” per se. What I mean is, women will say, “Well, I did pelvic rocking and my breech baby didn’t flip.” Kariminia’s study “Randomised Controlled Trial of Effect of Hands and Knees Posturing on Incidence of Occiput Posterior Position at Birth” showed no difference in rates of fetal position after pelvic rocking. That’s why Spinning Babies® has 3 Principles, and we recommend “Balance” before “Gravity” and “Movement.” This technique would be a gravity-friendly technique using movement. Is it to change baby’s position? No, Pelvic tilts (pelvic rocking) are to keep the spine flexible and help prevent the muscles and membranous attachments from back to pelvis from stiffening or resisting free range of motion.
ACTIVITY 8:
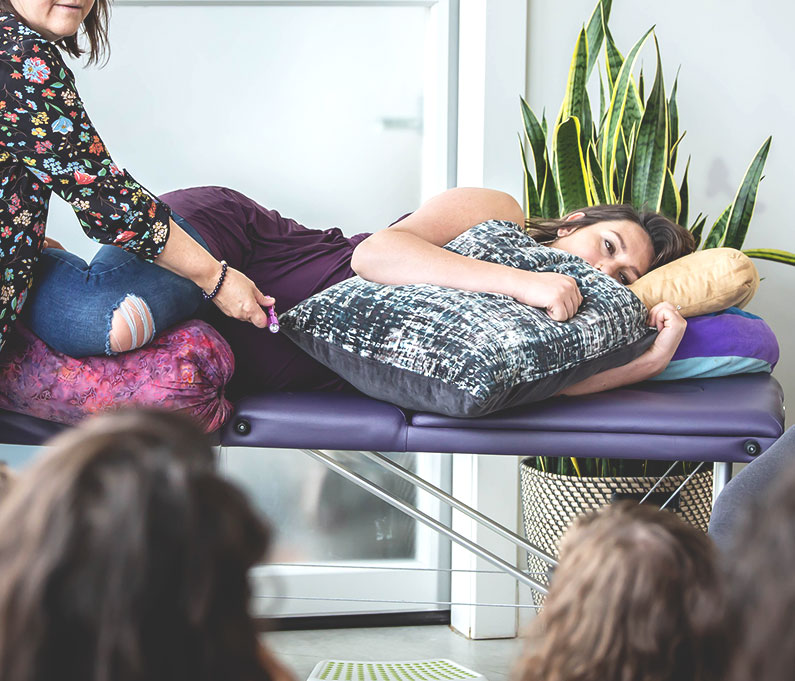
Rest Smart℠
Gravity-friendly maternal posture is the 2nd Principle of Spinning Babies®. Here are some Rest Smart℠ suggestions for pregnancy. These postures can also be used in labor. Think of your belly as a hammock and let the baby lie with his or her back settling into the hammock. Don’t “tuck your tail.” Pass the flashlight test.
“Rest Smart℠” in positions that let your baby’s back settle in your “hammock.” While resting or while on bed rest, make a little pillow nest to lay nearly on your tummy. Pillows hold your weight off the baby. Use your breastfeeding pillow, curve your body pillow, or semi-inflate a swim doughnut to dip your belly in the “nest.” It’s so comfy.
Sometimes you may want to just lay on either side. One hip is directly over the other, like a right angle. Don’t lean back, at least not for long. Leaning back without support can give you a muscle cramp. Change sides frequently for comfort and to help the uterus be a little more symmetrical.
Which side should I sleep on?
Going to sleep and/or waking on your left side seems to protect the well-being of baby. You have little control of which side you wake up on. You can learn to go to sleep on your left side. Then you will have met the “and/or” going to sleep or waking on your left that was found to protect against unexplained stillbirth (in a New Zealand study).
If your care provider asks you to avoid a position, ask them why. It may be that monitoring of the baby’s heartbeat or your blood pressure shows that a particular position is not good for you at that time. Changing positions may be good for the baby in general. Getting up to go to the bathroom one or more times a night seems to be protective of baby’s well-being, as noticed by the same New Zealand researchers mentioned above.
ACTIVITY 9:
Relaxing what is tight in general
Continue to relax the abdominal muscles and ligaments and move the pelvic joints. Relaxation doesn’t only mean taking a deep breath. Breathing evenly and deeply is important. For good fetal positioning and labor progress, the ligaments, joints, and fascia (the membrane surrounding our muscles, organs, and bones) need to be relaxed and symmetrical.
Other activities you may like to do (if not daily, then regularly 3-6 times a week):
- Prenatal yoga
- Belly dancing
- Swimming
- Good upright postures
- Hoola-hooping big circles on an exercise ball
- Emotional resolutions: journaling, counseling, prayer, forgiveness…
Many of the daily activities for pregnancy above can be found on our Daily Essentials download video.
ACTIVITY 10:
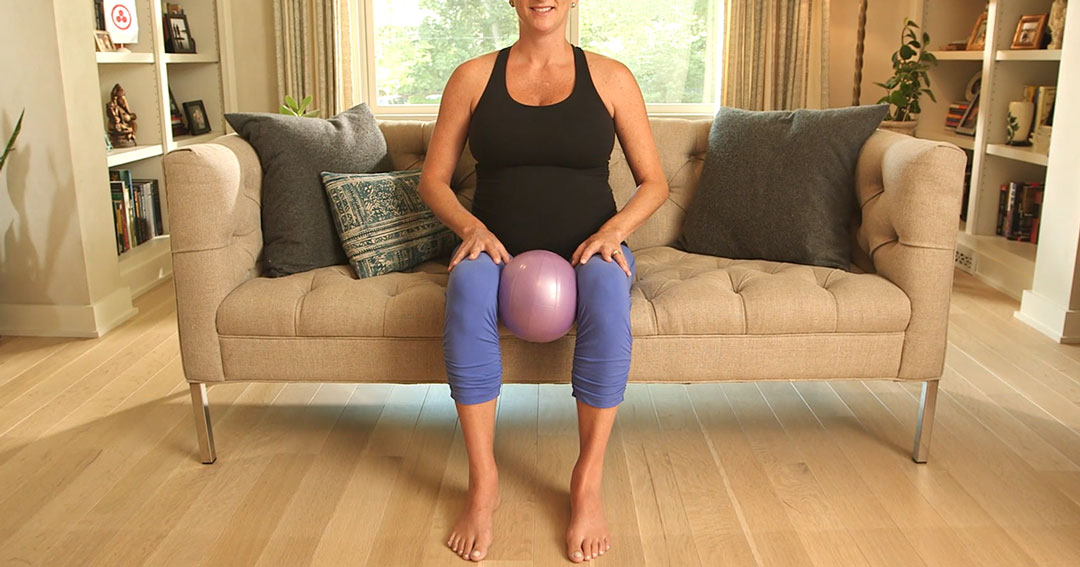
Ball Squeeze
The “ball squeeze” is a simple activity for enhancing balance and pelvic and bladder function. Pregnant or not, this is a very good activity! You can sit up in a chair or lie on the floor (or bed) on your back with bent knees. Either way works just as well. Get comfortable and aligned.
Place a nine-inch (23 cm) ball between your knees. With each exhale, squeeze the ball with your knees. Don’t act like an athlete for this. Simply squeeze enough to feel your muscles engage but not to see how strong you can be. Relax your legs while you inhale, but don’t let the ball drop to the floor. Repeat five times.
 Now move the ball to the middle of your thighs. Squeeze again with each exhale. Relax with each inhale for five repetitions. You’ll notice a new set of muscles are engaging. You can get fancy. Change the direction of your toes for each cycle of five squeezes. Here’s how:
- First, set your feet parallel, no farther apart than the ball is wide. Squeeze the ball five times between the knees and five times between the thighs with your feet in this position.
- Second, turn your toes out. Touch your heels together, but point your toes outward. Keep your feet flat on the floor. Again, squeeze the ball five times between both the knees and thighs with your feet in this position.
- Third and last, touch your toes together but set your heels apart. Repeat five times for both ways of squeezing the ball.
This is a great activity to repeat one or two times a day for several days in a row. Then repeat it at least every few days. If you forget and find bladder control, balance while walking, or pelvic pain (including symphysis pubis pain) bothering you again, then do these squeezes five times again, several days in a row.