DON’T Do Side-lying Release:
If you have hypermobility or very loose joints; have Ehlers-Danlo Syndrome; have very severe back or pelvic pain that makes getting into position painful in itself; or you haven’t read the directions.
Do Side-lying Release:
in labor for someone with an asynclitic or posterior baby; deep transverse arrest at or near 0 Station; long labor; back or pelvic pain, anxiety, or the person in labor wants to do one.
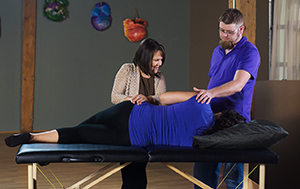
This is a technique that benefits from a helper. A person can do this alone with less precision, but an assistant can help make sure the pregnant person’s hips and shoulders are stacked.
The pregnant person chooses which side she feels more comfortable with first, but be sure to do this on BOTH sides so the pelvic floor is more even. This is very important!
Use a firm surface that’s as long as the pregnant person. The edge of a couch, bed, heavy table, or counter will do. A hospital bed works wonderfully too when raised a bit, during labor in the hospital.
Please read the instructions below carefully. Doing it incorrectly won’t help you.

Why? An imbalance in the pelvic floor twists the lower uterine segment (are you seeing how these body structures are all related?). This asymmetry can lead to malpositions such as a brow presentation, a posterior baby, or a breech. However, it is most often associated with the asynclitic baby, the one whose tipped head makes vaginal birth a challenge with long pushing stages and perhaps a switch to cesarean delivery.
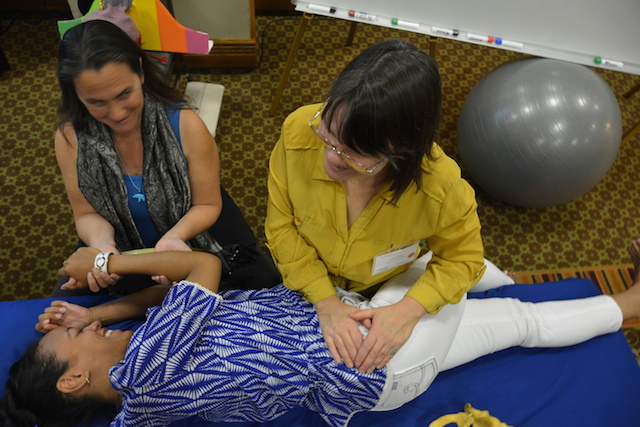
Who does this? This can be learned from a fascial therapist or another professional who uses Dynamic Body Balancing techniques taught by Dr. Carol Phillips, Chiropractor. A pregnant person and a birth partner can even do it themselves at home!
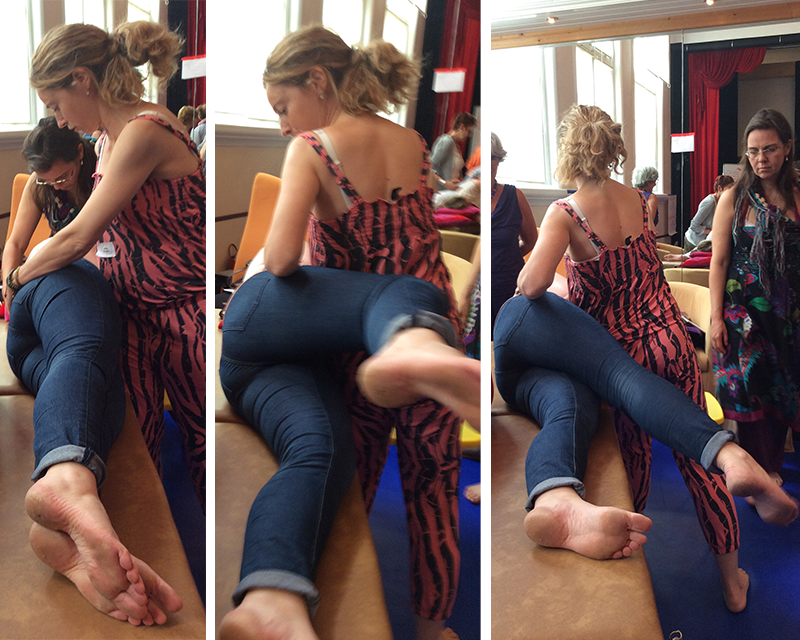
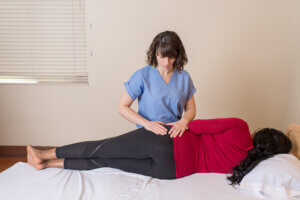
How? The pregnant person lays on the side more comfortable to start with. Shoulders are one above the other and the pelvis is not tilted! She can’t be leaning back to look up at you, for instance.
Her upper hip starts out directly above the other one. So her top leg is resting upon the lower leg. Her lower leg is straight as an arrow. Very straight. Her partner or her doula supports her shoulders so the top shoulder doesn’t tip forward. Face-to-face encouragement can be vital in labor and be the key to success! Don’t ask the laboring mother to do this without eye-to-eye contact and constant encouraging words! I’m serious!
The helper holds the anterior superior iliac crest… or the front of the hip bone. Press down about as much as you would to put a lid on a food container… firm but not a lot. Enough to notice, but not to make a statement.
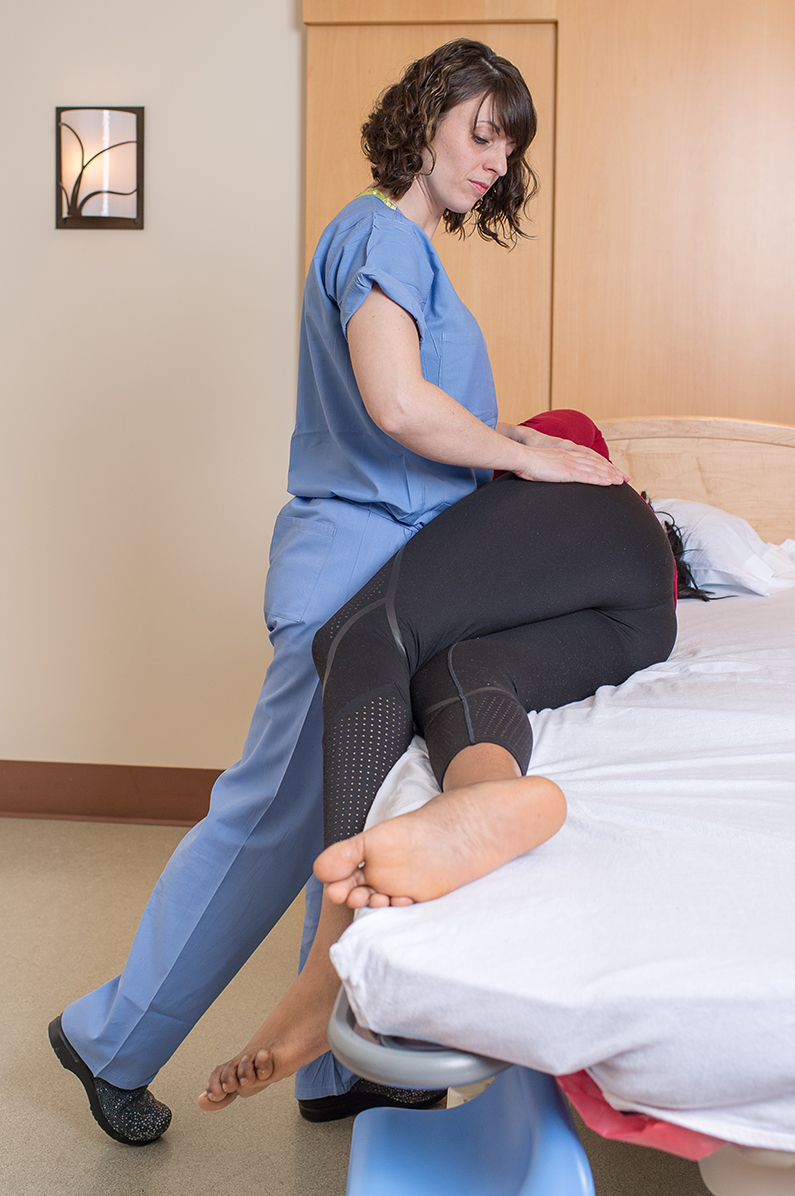
The mother has to be so close to the edge of the firm, hard surface that she relies on you totally to hold her from tipping off! Be trustworthy!
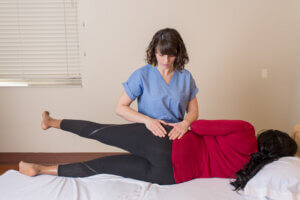
As the helper pushes down and back on her hip bone, the mother lets her top leg fall into the air. It hangs limp – you’ll have to coach her to let her leg go. Hold her firm so she believes she can do this without slipping off. Let her leg hang freely — it should not touch the floor or you! Wait a minute or two. In labor, wait through and between three contractions (two if she seems like she’d never make it through three, you know her personality).
Then she lifts her leg back up. Someone might help her but it can’t be the helper, she (or he) is holding her hip and must continue to so the mom won’t fall. She can lay on her back a second, then she switches sides. Her head goes where her feet were, or she switches to the other side of a massage table. Repeat for the other leg. Be confident and inspire confidence in the mother.
How long? This is hard to answer, perhaps 3 minutes or 3 contractions on each side. Most important is to do it on both sides!
How frequent? Weekly or more in pregnancy. In any early labor. In any active labor if person desires comfort or progress. In a labor that has a start and stop pattern. In those labors that are long, delayed, or that have malpositions. Before thinking the cesarean is the only way to end a labor in which it seems baby is too big.
Do this for… asynclitism; posterior presentation; to enhance a vaginal breech (done before labor or in early labor); slow descent due to a first time mother’s strong pelvic floor (ballerinas and horseback riders, runners, etc.) Long previous labors or pushing stages. Hip pain. Preventative or to help along a labor.
Don’t do this if…. you have significant symphysis pubis pain now, significant back injuries, like surgeries or spinal damage. (Scoliosis does not seem to be a reason not to do SLR.) You can’t hold safely a very large person to prevent them from falling forward off the table or hospital bed. There is no need to do this if labor is progressing well. It can be done during pushing stage if labor slows due to a “tight fit” or asynclitic head or there is reason to “make more room.” Do a ball squeeze as shown in our Daily Activities page before doing a SLR when the pubic symphysis is tender, avoid if significantly painful and see a professional bodyworker.
Note: Make sure to explain to the mother first that this may be a somewhat uncomfortable technique (some pregnant people find SLR more comfortable than not! Others find SLR challenging when a tipped head (asynclitic) is in the pelvis). Explain that it is vitally important to do it on both sides so that more asymmetry isn’t caused by doing it on only one side – and tipping the head more to the side because SLR was only done on one side.
Ask the laboring mother, before you start, to hold the position for 3 contractions on one side and 3 contractions on the other side. Let the mother pick which side to start on. She will pick the more comfortable side first and that’s fine. You can hold the leg up a bit during a contraction if the hip hurts so much (it might in rare cases).
This technique is awesome. It has helped many women avoid a cesarean (but not all). I would say SLR works wonders! After it’s done, the reduction in the pain is significant!
Again, thanks to Dr. Carol Phillips, DC, for teaching me this one at a long birth. That willing birthing woman was suddenly so relaxed that she dozed at 8 cm and began pushing her baby out so quietly the midwife almost didn’t turn around from her charting at the counter to catch the baby! Later, I’ve used it at many a labor with an asynclitic baby. It’s not always dramatic, but almost always resumes progress. This shows that a lot of slow progress isn’t the bony pelvis as much as the tension of the pelvic floor. It’s worth a try!
Check: Is their back straight? Use a box or another flat object along their lower back to line up the hips (see below). Only use the box for a second to check your alignment – but don’t let go of the hip!
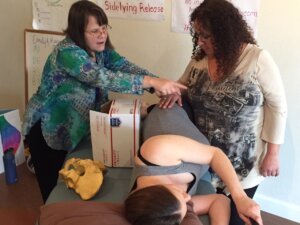
Is the top shoulder directly over the lower shoulder? She can hold a chair, a table, or a helper, but the top hip must stay over the lower hip!
Helper: Don’t let their hip lean forward! Let the full weight of the top leg hang free. Avoid the pregnant person’s thigh so it can hang freely. The pregnant person breathes deeply and slowly, and as their belly relaxes, their leg relaxes more too.
In pregnancy: Their leg should hang for about 2.5 minutes. It’s okay to try it longer, but it’s vital that it’s done on both sides. A few people have reported holding each side for up to 20 minutes to flip a breech, but this length of time is not required for head-down babies. Explore for yourself and see what feels best for each situation.
In labor: Let the leg hang through 3 contractions, then switch sides for another 3 contractions. Sometimes a rest comes after 2 contractions and the uterus stops contracting for a few minutes to an hour. You will see regular contractions that are more effective either immediately or after the rest period. If contractions strengthen but then slow again, assess and address engagement or a locked sacrum, then repeat SLR and see the labor progress.
This technique is awesome. It has helped many women avoid a cesarean (but not all). I would say it works wonders! After it’s done, the reduction in the pain women feel in labor is significant! There has been many testimonies of births that were able to avoid a cesarean with one Side-lying Release or a SLR along with other techniques and birth positions. There are unusual situations of water breaking, usually in long labors where the SLR is done and the baby is born within two hours or less. The theory is baby’s head turns and comes quickly onto the cervix and breaks the water in the fast descent. It’s not the usual story but it happens.
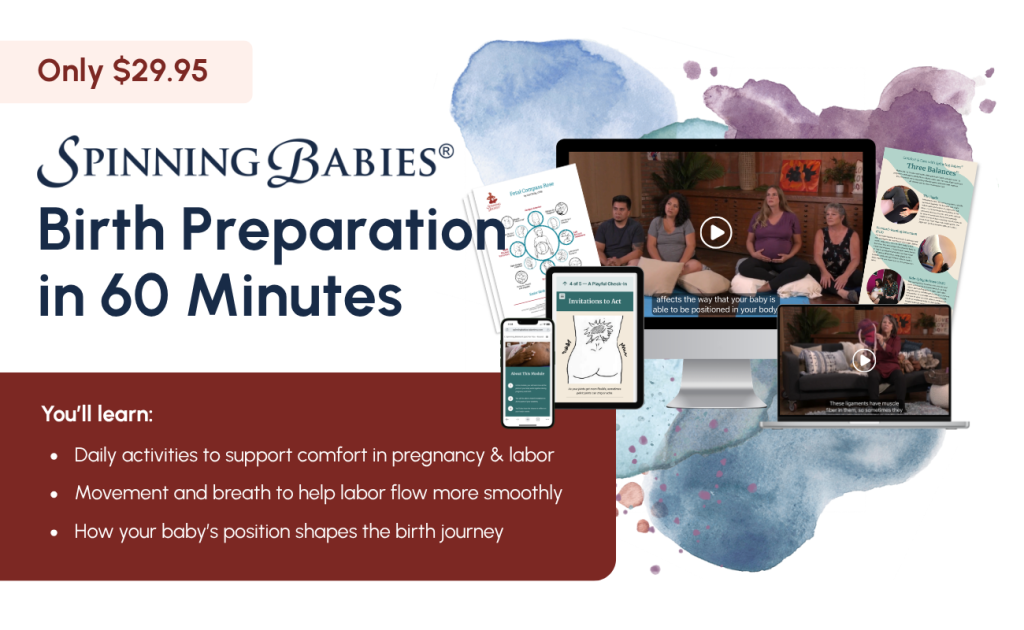
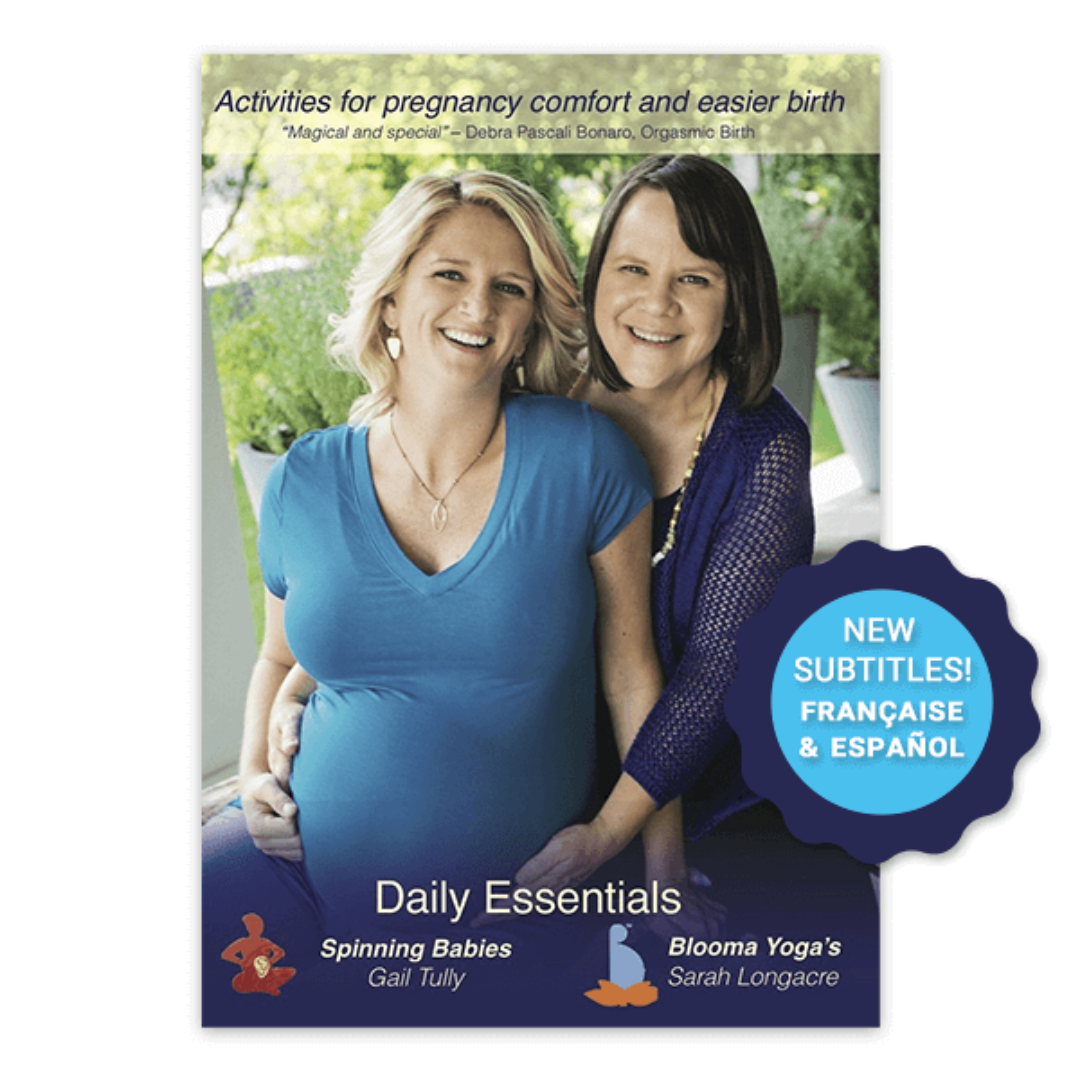
Learn step-by-step how to do the Side-lying Release by watching Gail Tully teach it to pregnant parents in our Spinning Babies® Parent Class video. Parents across the globe are using these techniques for comfort in pregnancy and easier birth—and they’re working! Available on DVD or digital download.
If done alone, the woman needs to brace herself with their arm while holding a heavy table, for instance. She has to consciously keep their hips stacked one above the other as well. It’s not easy to get aligned well so I actually recommend the various hip openers in a prenatal yoga, in stead. But here is a go at SLR Solo.
How long? 3-20 minutes one each side and do both sides so that you don’t create imbalance. When done correctly the result is renewed pregnancy glow, comfort and calm. Walking is easier and more comfortable because hips move more freely. So these results will inform you in pregnancy.
In labor, 2-3 contractions on each side or about 10-15 minutes each side and do both sides within a few minutes of one another or if using an epidural do one side before turning over and then the other side when just turned to that side, each time turning over when a helper is available.
If one side of the body is tighter or higher than the other, the asymmetrical tension can pull the pelvis out of balance. The uterus can then be tipped and/or rotated and baby fits the best position they can, which might be posterior or asynclitic.
Even a well positioned baby can have to move through a tighter pelvic floor than necessary. The SLR temporarily lengthens the pelvic floor muscles by releasing tension. Even if the pelvic floor is evenly tight, fetal rotation or descent can take longer than usual. The strong pelvic floor of a dancer or horseback rider may lengthen labor considerably.
Common habits of modern life can make the pelvis tight on one side or even twist the hips. Simple things like driving a car, crossing our legs, sports accidents, and falls on the head or bum might all affect the pelvic floor.
Tension or torsion in the pelvic floor makes labor longer. An uneven tightness in the pelvic floor may make the baby’s head tip, causing an asynclitism (tipped head) that makes labor longer and increases the need for a cesarean or vacuum (ventouse).
The Side-lying Release can help labor progress, reduce pain, and calm a tense birthing woman. Try it in the presence of a posterior, brow, or asynclitic fetal presentation. It is also helpful when labor is taking longer or feels sharper than expected.
Some feel a subtle stretch of muscles, while others feel nothing at all. Pain means either you’re on too hard a surface or some part of the person is not lined up properly and needs to be adjusted. This technique stretches several muscles and muscle groups:
Not all women feel something stretch, but most people do feel genuinely more relaxed afterward.
Please note: As with any technique, there are rare complications. Use with the understanding that there could be an adverse reaction. Occasionally we see spontaneous membrane release in active labor following fetal rotation during the Side-lying Release. Typically there is a rapid return to progress however. I have never known SLR to begin a labor before term.
Please note: You should ask your care provider if there is any other medical reason not to do the Side-lying Release before you attempt it.
If the baby is high in the pelvis or above the pelvis, a Side-lying Release may still help. But more specific to a non-engaged baby is the Abdominal Lift and Tuck through ten contractions (not in between).
If Abdominal Lift and Tuck doesn’t work, or if a heavy epidural is in use, do brim-opening Walcher’s position through, and between, three contractions. These help the baby into the pelvic brim when the baby is -3 or higher (-2 is worth a try with Walcher’s too) and contractions are not able to bring the baby into the pelvis. If the baby is already engaged, Side-lying Release will likely help when the baby is at or near 0 station.
Older people or people with tight legs may feel a pull on the outer leg. If it’s sharp, stop and address the muscles on the outer leg with a massage stroke. If it’s still painful, stop the SLR and address the muscle before repeating.
Please pay attention to a pain that persists more than a few minutes. Report any abdominal or shoulder pain to your provider.
Stop these or other exercises immediately if the baby begins sudden, vigorous, frantic movements during the new position. Don’t get upside down or do the Side-lying Release after such vigorous movements and have the baby’s heartbeat assessed immediately.
Frantic fetal movement or placenta pain is an unusual occurrence in any event, and extremely unusual at Spinning Babies®. Listen to your body and check out unusual symptoms with your physician before trying these exercises. Thousands of women are getting mild or dramatic benefits from Side-lying Releases, but it’s important to always put safety first.